Read the article: Lighting Demystified
How to Plan a Lighting Installation Layout for a Kitchen in a Few Easy Steps
The ideal time to plan kitchen lighting is during a remodel, however it is possible to revamp it at any time thanks to Richelieu’s easy plug-and-play system.
In this article, we’ll cover the layout installation for a kitchen, but the same steps can be applied to any project, although the actual lighting fixtures might not be the same.
At this point, we presume that you already know the type of lighting you’ll be using and the number of fixtures to be installed. If you need help deciding, you can learn more on the topic:
So, now that you’ve selected the type of lights to be used and decided where to put them, it’s time to figure out how to install them.
Step 1
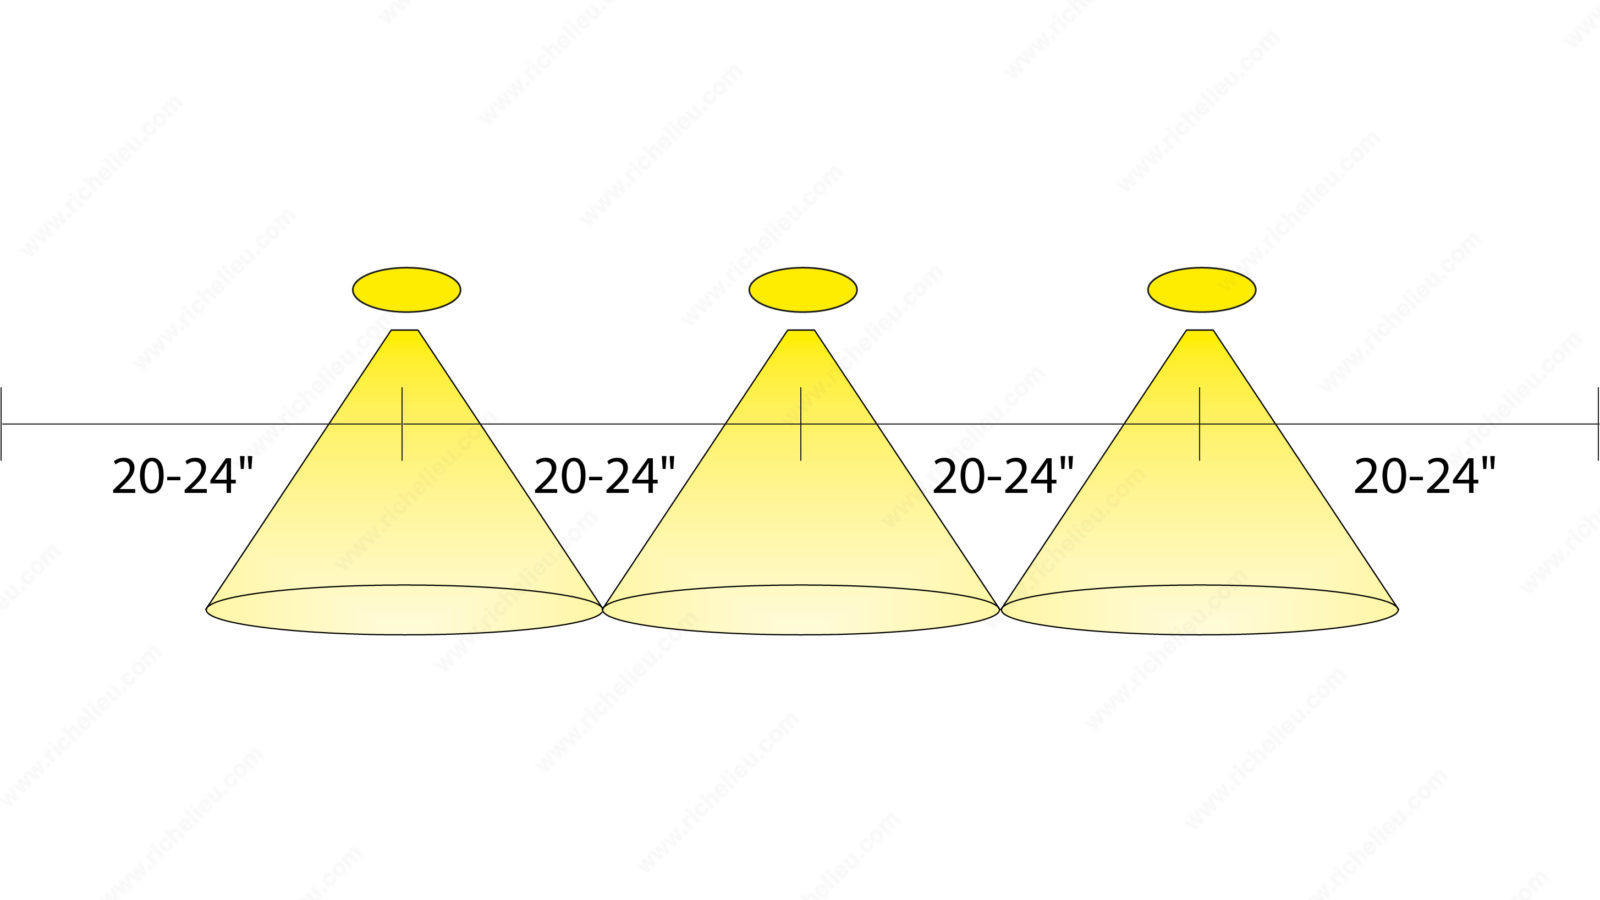
For under-cabinet task lighting, start by calculating how many lights you’ll need. The best placement for puck lights is one that is centered under the upper cabinet and spaced out evenly. A good rule of thumb is to place them 20 to 24 inches apart for the ideal beam spread. Measure the full length of the cabinetry and work from the outside in. In the case of strip lights, you’ll use the total length of the row of upper cabinets.
For example, for an 8-foot row of upper cabinets requiring surface mounted lights underneath to light up the countertops, count 20 to 24 inches from the wall to the first light, then 20 to 24 inches from that light to the next one until the end of the row, for a total of 3 lights to light up 8 feet of countertop.
Step 2
You’ll have to figure out where the electrical outlets are placed to know into which to plug the lights. Outlets can be in the kitchen walls (or an electrical box if a hardwire connection is required) behind or above the cabinets. The outlet’s location will dictate the perfect spot to hide the power supply, usually on top of the upper cabinets.
If you are doing a complete kitchen remodel, it’s better to do this step right at the beginning to choose the location of the electrical outlet based on the lighting layout for optimal efficiency.
However, if you aren’t opening up the walls, a new lighting layout can still be managed with the existing placement of electrical outlets. Just make sure you have a detailed plan of where the wires are running.
Step 3
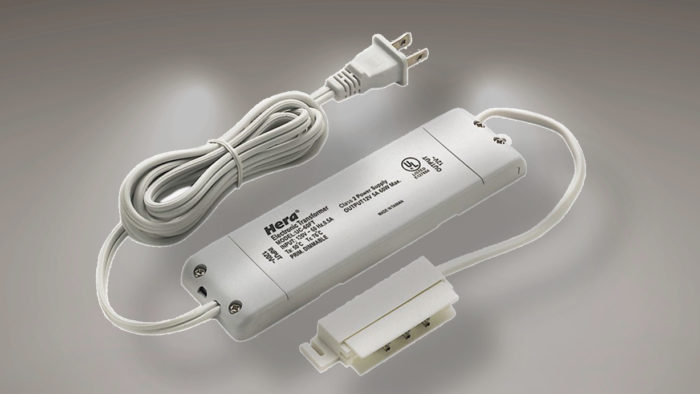
Choosing the right power supply is based on the total wattage (15 W, 30 W, 60 W or 75 W). You can calculate the total consumption in watts by adding up the wattage of each light, for example, 1 light @ 3 W = 9 W for 3 lights. You can refer to the product page on the Richelieu website to find the wattage for each type of light.
As a rule of thumb, always choose the power supply with a wattage rating of equal or higher value than the total wattage of your lights for optimal efficiency.
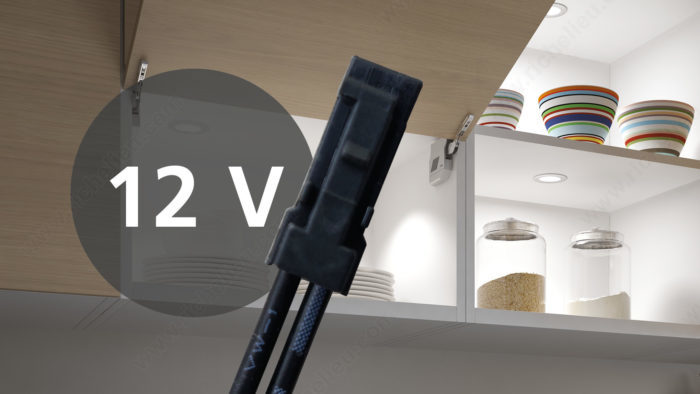
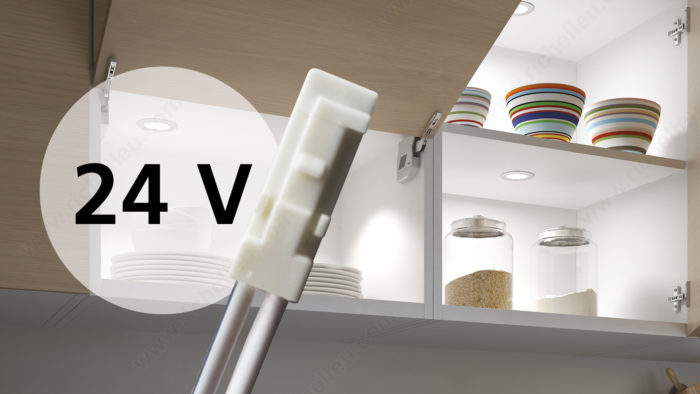
Voltage should also be taken into consideration. Some lights run on 12 V and others on 24 V. Richelieu makes it easy to know which connectors and cables to use depending on the voltage. Sets are color coordinated with an easy plug-and-play system.
Pro tip: Use 24 V lights to connect lights over 12 feet in length on the same power supply. This will ensure optimum brightness of each light over the entire length.
12 V = black and 24 V = white
Step 4
Consider how many cable extensions are needed to make the power supply reach the power outlet. Every light comes with a standard 2 m cable and extensions are available separately.
Strip lighting can be cut at 1-inch intervals and reconnected using interconnecting cables available in different sizes.
Pro tip: Use a power cable to connect light strips to the power supply.
Step 5
Now would be a good time to consider adding dimmer switches for every light. Richelieu makes it easy, as our switches are compatible with every light fixture offered. Also, some luminaires offer different trim ring options that add a decorative element to the lighting.

Step 6
Plug it in. Connect all the lights into the power supply’s hub and the power supply cord into the wall outlet and voila! You have successfully included kitchen lighting into your new kitchen design without the help of an electrician.
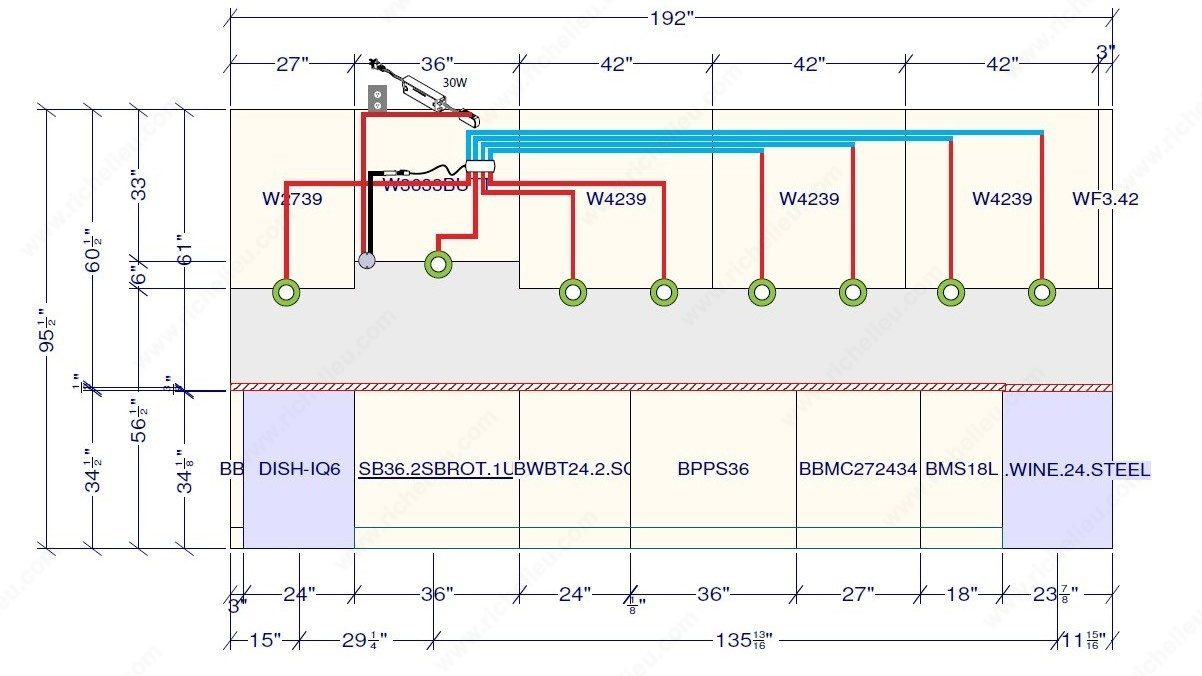
In the end, your lighting layout should look something like this: